Thursday, July 17, 2014

Recycled Instruments: Stringed Instruments

Music is a universal and unique medium through which humans communicate. In the modern age, there are innumerable ways to create music using diverse, non-traditional materials. Personally, I'm slightly obsessed w/ DIY and upcycling, so I took this approach and built a series of recycled instruments. 
Here are my three favorite stringed instruments!

Box Guitar

Materials: 
Cardboard box
Toothpicks/skewers
Rubber bands
& lots of hot glue


How to build:
1. The cardboard box acts as the resonance chamber. Fold the box so that there is a gap somewhere on top. Play around with different box shapes and gap sizes to find a sound you like.

2. Test the stretchiness of your rubber bands. Determine what sounds you like, and note how much they need to be stretched to make those sounds. Organize the rubber bands by pitch (high vs. low).

3. Insert a skewer or toothpick into the box where you plan on anchoring one end of the rubber band (right side in the photo above). Hot glue it into place and add a dab of glue to the top to keep the band from slipping off. 
(It's easiest to start w/ the lowest notes, since those are the longest.)

4. Stretch the rubber band across the gap. Test various sounds by stretching the rubber band at different lengths. Stop when you find a sound you like, and mark where you want the skewer (either w/ a pen or by poking a hole into the box). 
You can get two, or three, unique notes by shaping the rubber band into a triangle. This takes some trial and error and a good deal of patience, but is oh-so satisfying when you find the right notes.

5. Insert skewer(s) & glue into place, again adding a dab of glue at the top. 

6. Repeat 2 - 5 as necessary. Remember to keep testing the sounds as you go, checking the harmony of new notes w/ those already installed. 

7. Glue top flaps of box for structural support. 

8. Decorate! 

That's it! It's recommended to go slow and glue only when you're completely satisfied w/ the notes. It's possible to fix it later, but it's easier to get it right the first time :) 


 Polygonalin 


Materials:
Styrofoam/paper cup
A bundle of toothpicks/skewers
Rubber bands
Hot glue!

How to build:
1. Poke hole in center of cup

2.Stick a bunch of toothpicks around the outside of the cup. The number and spacing determine the types of sounds you get, so test out various combinations.

3. When you are satisfied and/or fed up, hot glue the toothpicks onto the cup. Add a dab of glue onto the top of the toothpick (again, to keep the rubber band from slipping off).

4. Add in rubber bands! Create and test different polygon shapes. Ideally each side will sound out a unique note.
Three rubber bands each w/ three distinct sounds gave me enough notes to enjoyably and easily create music.

TaDa! Play away! Skewers make a convenient plucking tool.


Cupsichord

Materials:
Styrofoam/paper cup
Cardboard
Toothpicks/Skewers
Rubber bands
Hot glue

How to build:
1. Glue a circular piece of cardboard to the bottom of the cup (structural support).

2. Poke a hole through the middle of both the cardboard and cup.

3. Stick and glue three or more toothpicks onto the cup.

4. Stick and glue a skewer into the cardboard horizontally; the setup is similar to a banjo or guitar or any other stringed instrument w/ a neck.

5. Glue toothpicks onto the end of the horizontal skewer. Check the spacing by stretching a rubber band to those lengths to be sure you are getting the sounds you want.
(These allow for more combinations of notes on one lil' cup instrument!)

6. Attach rubber bands and make music!


As always, please let me know if you have any questions! And post your creations! I love seeing the awesome ideas other people concoct :D

Wednesday, July 9, 2014

Blinking Light(s) w/ the Raspberry Pi!

Getting a light to blink using the Pi's GPIO pins is the equivalent of a "Hello World" test program. If that doesn't make sense, all you need to know is that this project is a sweet first project that covers a lot of the basics that will help when you design and build your own ideas!


1. First, gather the following materials:
Breadboard (or wires/alligator clips)
2 Breadboard wires (Male-to-female are ideal)
1 (or more!) LED (Light Emitting Diode)
1 330 Ohm resistor
And the rest of the normal stuff to set up the RPi (SD card, power cord, keyboard + mouse (or just keyboard), HDMI cable and monitor.)

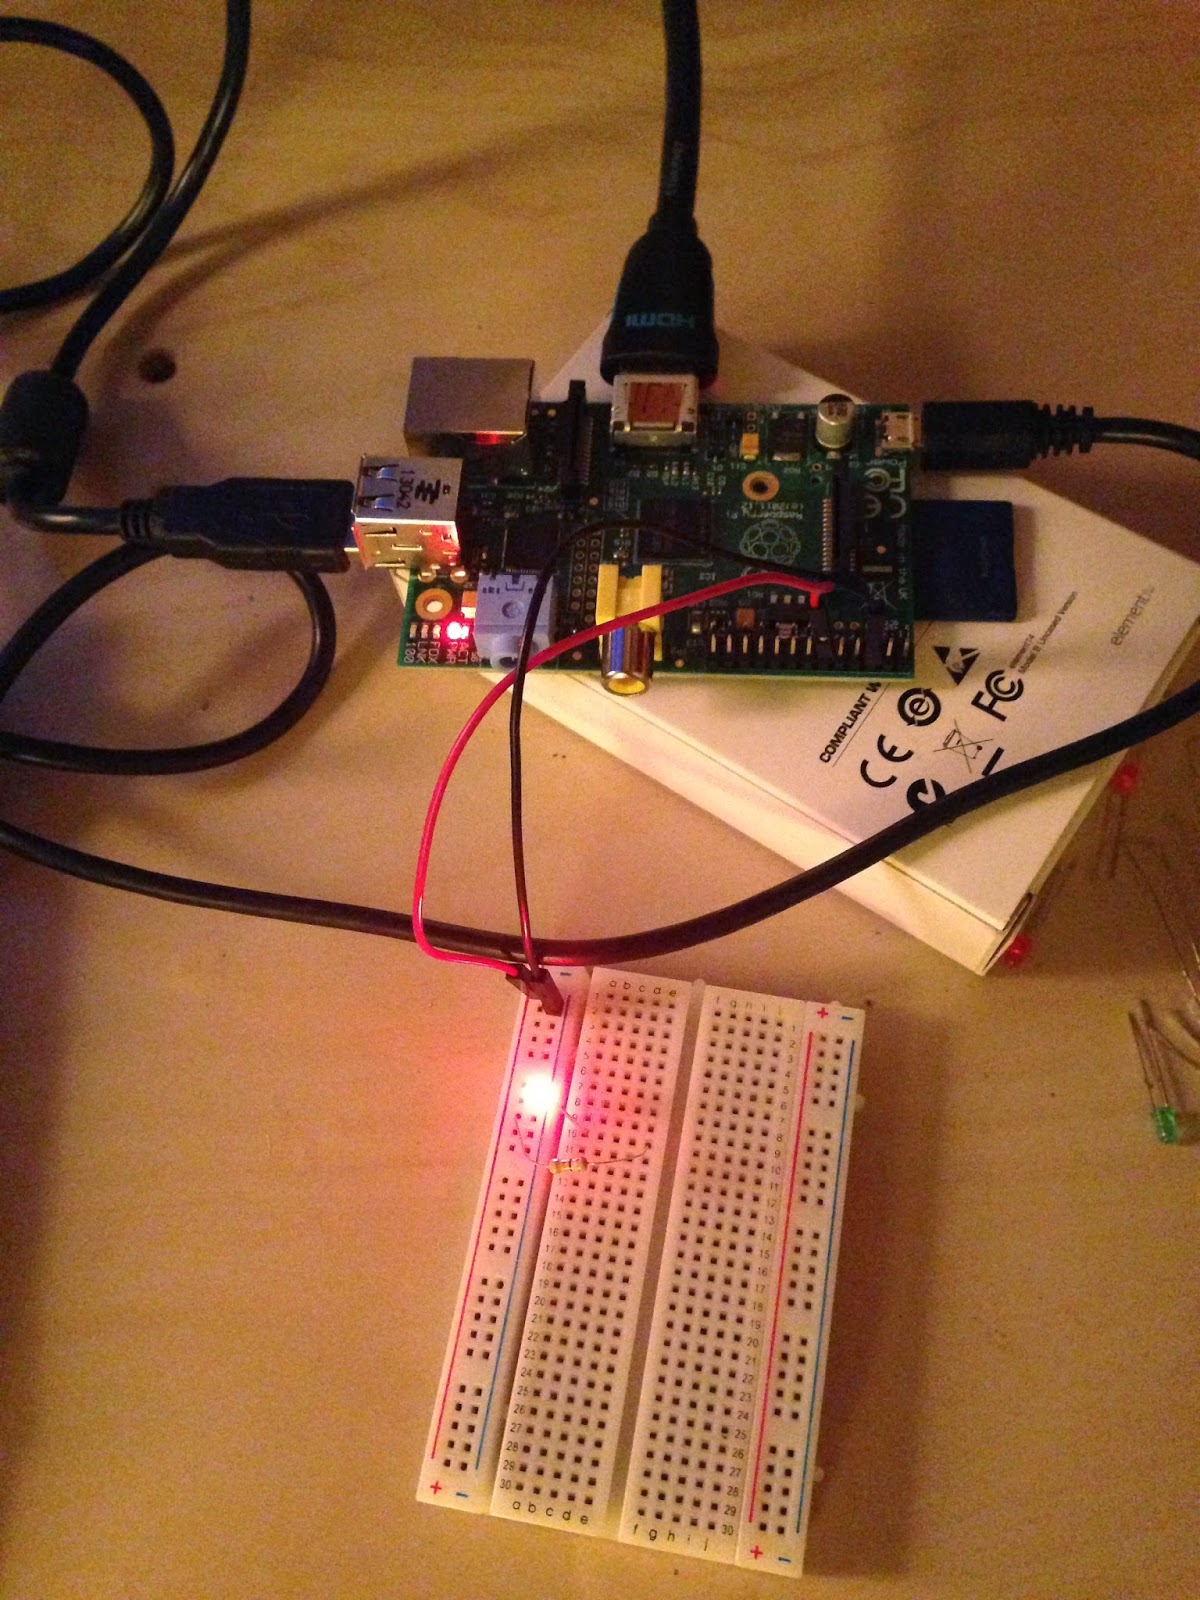
2. Wire up the breadboard!
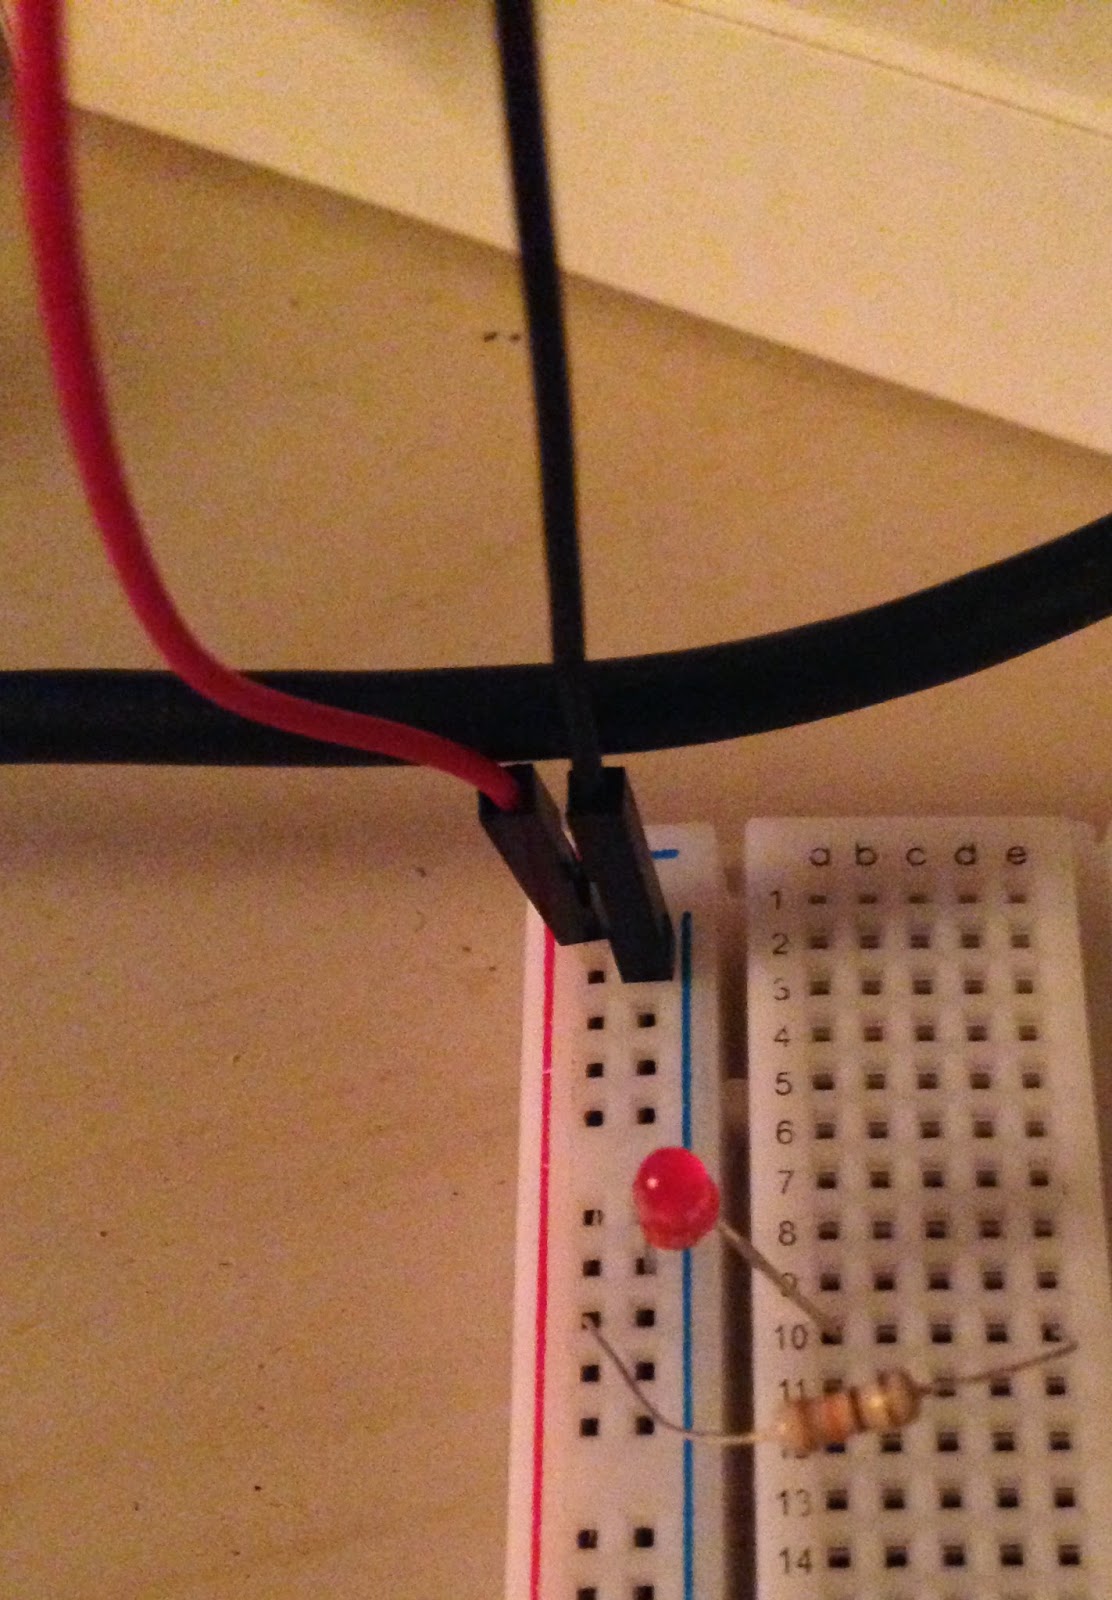
Pick a GPIO pin. Attach the female end of one breadboard wire to the GPIO pin, and the male end to the positive slot on the breadboard. (I picked GPIO 18 b/c it is close to ground.)
Connect the other breadboard wire from ground on the RPi (third down on exterior side) to negative slot on the breadboard.
Connect the resistor from the positive series of holes to an open row on the breadboard (I picked row 10).
Connect the long side of the LED to the same row the resistor is in. Connect the short side to the negative slot.
Make sure nothing explodes (just kidding that probably won't happen :) )

3. Write a quick Python program.
The program switches the GPIO pin between on and off, turning the LED on/off as it switches. Save the program somewhere easy, like the Desktop.

Here's my code if you need some assistance:
import RPi.GPIO as gpio
import time

#SEtup pin 18 as an output
gpio.setmode(gpio.BCM)
gpio.setup(18, gpio.OUT)

#define data to be the value of pin 18
#data = GPIO.IN0(18)

#Make an LED flash on and off
while True:
    gpio.output(18, gpio.HIGH)
    print('Light is on.') #Optional printout of status
    time.sleep(1) #changing the number increases/decreases length of signal
    #print(data)
    gpio.output(18, gpio.LOW)
    print('Light is off.') #Optional printout of status
    time.sleep(1)
    #print(data)

4. Run the program!

In the terminal window, go to the folder where you saved your program. The command cd + the directory name (ex. /home/pi/Desktop) will take you there.
Run the program by typing sudo python "ProgramTitle".py
As long as everything is connected and the program does what you think it does, the LED will flash.
That's it! Super simple, and it means that this little RPi computer just controlled a physical object wooooo!!!


Optional fun:
- Change the timing of the blink.
- Connect a couple more LEDs the same way you connected the first (these will be in parallel with each other).
- Connect additional GPIO pins to more LEDs and change the timing (remember to also add in the appropriate code).


www,atariarchives.org
Helpful info:
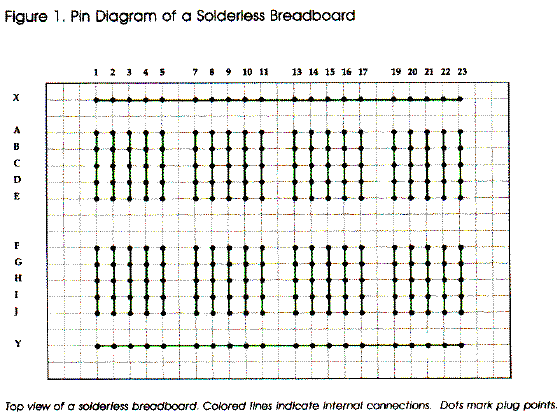
As shown in the photo to the right, breadboards usually have columns for positive and negative (red and black, respectively) that are connected electrically all the way down the board.  Each row contains 5 holes that are also connected.

The resistor needs to go in between the LED and the power source to limit the amount of current, or electricity, flowing through the LED. The LED would be brighter w/out the resistor, but it will probably burn up super quick.


Happy building!


Creative Commons License
This work by Jennifer Fox is licensed under a Creative Commons Attribution-NonCommercial-ShareAlike 4.0 International License